
Correcting Misaligned Columns: The Process Explained
 Misalignment is pretty self-explanatory, and so does in the context of columns. The underlying cause of misalignment stems from improper construction techniques where forms are not fixed straight up. However, the term misalignment is kind of ambiguous, at least in the engineering sense. So let’s look further into correcting misaligned columns.
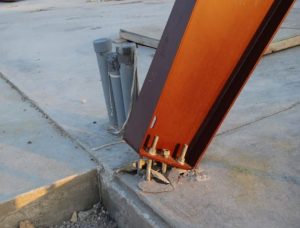
To elaborate, small misalignment of 100 mm isn’t a cause for structural concerns, however, more than that requires advanced repair methodology called jacketing. But that’s not our focus here. On the architectural side of things, it’s here where even the slightest column misalignment can cause problems.
When Columns Are Misaligned Correcting Them Takes Careful Setting Out
Say, a column is misaligned by 25 mm, this means that it already eats up 25 mm of space intended for partitions and openings. But isn’t that insignificant? Well, perhaps. But the true problem arises when all layouts around the structure are affected, prompting you to readjust all layouts — which of course is a tedious work.
Plus, if you’re planning to remodel your property, layout of new walls and rooms always get their reference point from columns. Thereby giving you a wrong initial reference point. If you’re not careful, your new walls and rooms might end up being misaligned as well.
Other problems that may arise from misaligned columns are reduced bedroom floor space, adjustment of openings such as windows and doors, and the need to revise all architectural layouts.
How to Proceed When Correcting Misaligned Columns
Step 1: Mark the delimitation area that needs to be corrected.
- What we do is get our initial point of verticality from the top-most portion of the column so that when we project that line straight downwards, most of the corrective work will appear on the ground level, not above-ground — which of course is much easier.
Step 2: Chip off misaligned portion if it’s bulging or roughen the surface if it’s recessed.
- A rough surface is important so that it can establish good mechanical bonding between the column face and patching material.
Step 3: Prepare non-shrink mortar.
- Follow manufacturer’s recommendations.
- Make sure that the compressive strength of the mortar is stronger than that of the column.
- If in any case that the compressive strength of the mortar is less than that of the column, apply an epoxy binding agent between the two materials.
Step 4: Patch up the area until the new alignment is reached.
- If the misalignment is recessed, the minimum thickness wherein the mortar will adhere properly is 25 mm.
- For thick repairs, apply mortar in layers of maximum 25 mm then cure for half an hour before the next layer is applied until the desired thickness is reached.
Step 5: Finish the mortar using stainless steel trowel.
Contact Us for More!
If you don’t want to deal with such problems in the future when you finally decide to remodel or perhaps you want to optimize your floor space, call us at Affordable Structural Builders. It will be our pleasure to conduct a comprehensive assessment of your property and offer excellent solutions at competitive prices! Feel free to contact us.
At Affordable Structural Builders, utmost care to workmanship is our primary concern. With our outstanding team of technicians and engineers — all of whom work tirelessly towards project completion, expect nothing short of excellent service!